Ostrich Egg Ice Cream!
Track down an ostrich egg and you’ll have a yolk the size of your wildest dessert dreams! Is there a better way to impress your party guests than with an ostrich egg custard ice cream? I doubt it! This dish is best started by securing your egg from suppliers like Flöeck’s Country. It might appear exotic, but trust me, the result is mouthwatering!
As culinary adventurers, we’re using a rich French-style yolk custard base—split into two batches to maximize safety and efficiency. One of these massive yolks weighs 740 grams, making it the ultimate ingredient for a luxurious, velvety ice cream. With a home ice churner, plenty of kosher or rock salt, and a stock of ice, we’re off to the races!
You might ask, “Why split the yolk?” Because your kitchen pot probably can’t handle this much custard base.
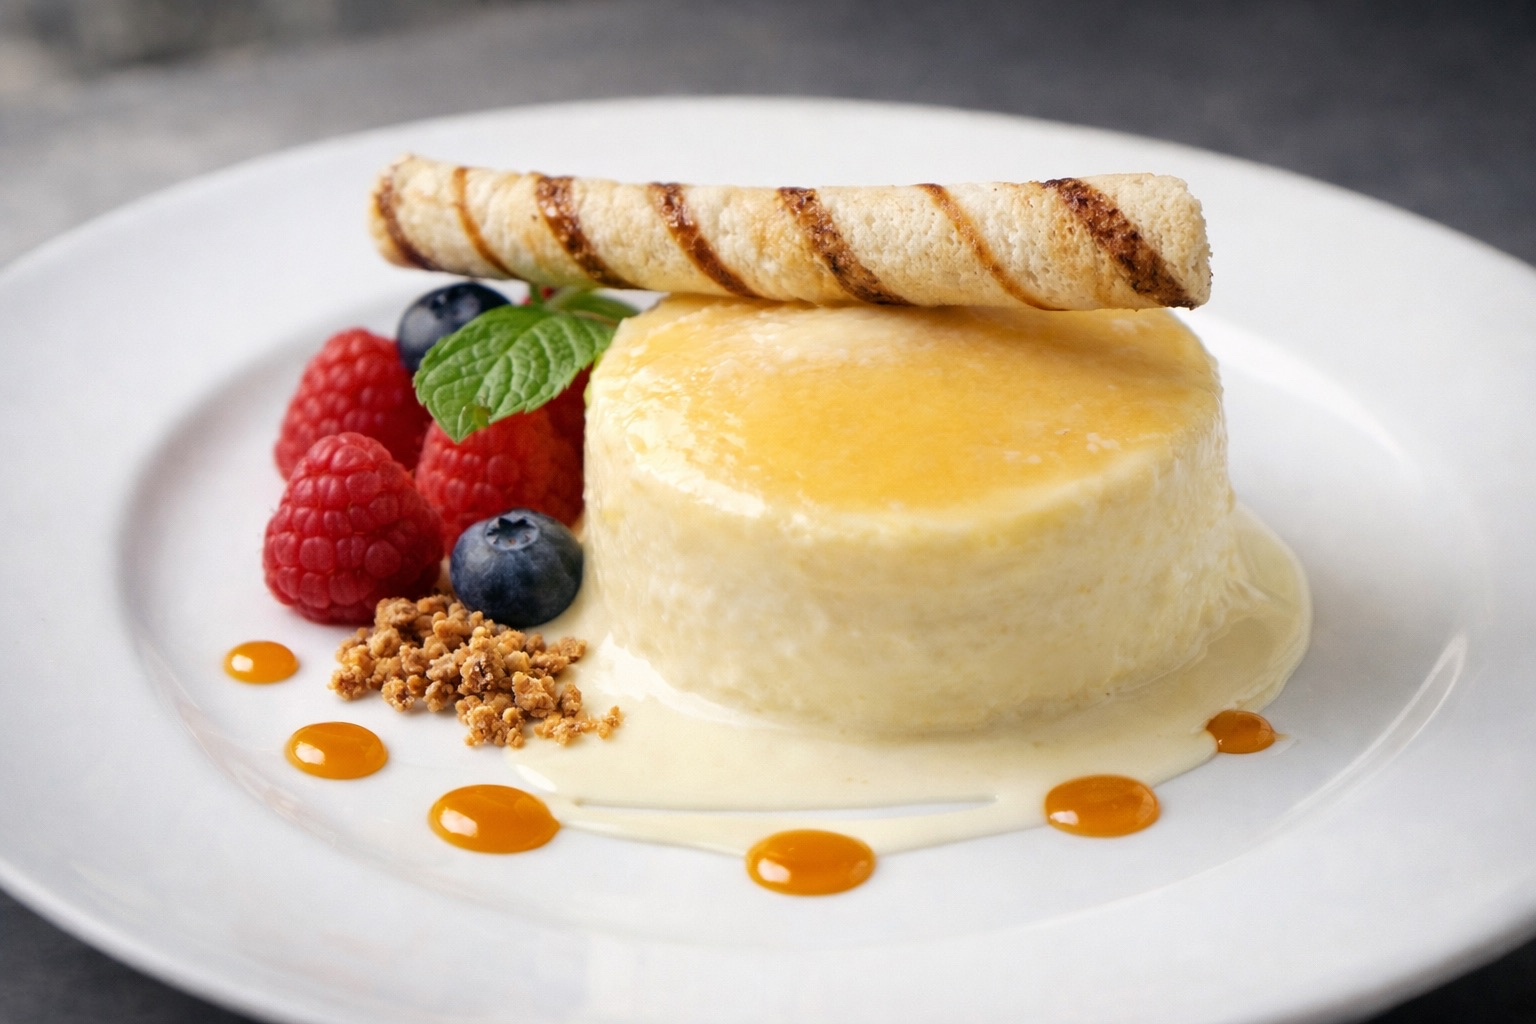
But we don’t stop at just making the base! Picture this: an exquisite plating situation that would make Michelin inspectors swoon. Place your ice cream a touch off-center for that effortless flair. Gather luscious berries into tight, tantalizing clusters. Forget haphazard caramel—place it as precise dots, and neglect drizzling at your peril. The perfection of your dish peaks with a single, tall element—a stylish pirouette to give your presentation height. Crumble small and neat, because in the symphony of ice cream, restraint is as important as taste.
Ostrich Egg Ice Cream — 740 g Yolk
Two-Batch Method
This version is written only as a 2-batch method for easier cooking, safer custard control, and simpler chilling and churning.
Batch Formula
Batch 1
- 370 g ostrich egg yolk
- 1.85 L heavy cream
- 925 ml whole milk
- 444 g granulated sugar
- 1 tbsp + 2 tsp vanilla extract
- scant 1/2 tsp fine salt
Batch 2
- 370 g ostrich egg yolk
- 1.85 L heavy cream
- 925 ml whole milk
- 444 g granulated sugar
- 1 tbsp + 2 tsp vanilla extract
- scant 1/2 tsp fine salt
Why Use 2 Batches
Working in 2 batches keeps the custard easier to control. A very large yolk-heavy base can heat unevenly, thicken too fast, and become harder to strain cleanly if cooked all at once. Smaller batches give better texture, less risk of scrambling, and a more manageable volume for chilling and churning.
Method
1. Divide and set up both batches before heating anything
Measure each batch fully before you start cooking.
Why: Custard moves quickly once the dairy is hot. Pre-measuring keeps you from scrambling for ingredients while the base is at its most fragile stage.
2. Whisk the yolks with part of the sugar until smooth
For each batch, put the 370 g yolk in a bowl and whisk with roughly half the sugar until fully smooth and slightly loosened.
Why: Sugar helps break up the yolks and makes them easier to temper evenly. Starting with a smooth yolk mixture reduces the risk of lumps and helps the finished custard stay silky.
3. Heat the cream, milk, remaining sugar, and salt just to steaming
In a heavy pot, combine the heavy cream, whole milk, remaining sugar, and salt. Heat gently until steaming but not boiling.
Why: You want the dairy hot enough to cook the yolks gradually, but not so hot that it shocks them into curdling. A gentle steam stage gives you control.
4. Temper the yolks slowly
While whisking the yolk mixture, slowly ladle in some of the hot dairy. Once the yolks are warmed, add the rest gradually.
Why: Tempering raises the yolk temperature in stages. This keeps the yolks from scrambling and gives the custard a smooth, even texture.
5. Return the mixture to the pot and cook gently
Pour the tempered mixture back into the pot. Cook over low to medium-low heat, stirring constantly and scraping the bottom and corners.
Why: Custard thickens first in the hot spots, especially at the bottom and edges of the pot. Constant stirring keeps the texture uniform and prevents bits of overcooked egg from forming.
6. Stop cooking at 170–175°F
Cook until the custard reaches 170–175°F, or until it coats the back of a spoon.
Why: This is the sweet spot where the yolks thicken the base properly without pushing it too far into curdled territory. Going much hotter increases the risk of graininess.
7. Strain immediately
Pour each finished batch through a fine-mesh strainer into a clean container.
Why: Straining removes any tiny coagulated bits and gives you the smoothest possible final base. Doing it immediately stops those bits from sitting in the custard and affecting texture.
8. Stir in the vanilla after straining
Add the vanilla extract once the base is off the heat and strained.
Why: Adding vanilla at the end protects more of its aroma. Long exposure to heat can flatten the flavor.
9. Chill both batches completely
Cool the containers quickly, ideally over an ice bath first, then refrigerate until fully cold. Overnight is best.
Why: A fully chilled base churns faster, freezes with a better texture, and puts less stress on the ice cream machine. Warm base churns poorly and can turn greasy or loose.
10. Churn in portions your machine can comfortably handle
Churn each batch according to your machine’s capacity rather than overfilling it.
Why: Overloading the machine slows freezing and reduces air incorporation. Proper batch size gives a cleaner, denser, more professional texture.
11. Pack and freeze immediately
Transfer the churned ice cream into its final containers and freeze until firm.
Why: Freshly churned ice cream is at its most delicate. Packing it right away protects texture and avoids unnecessary melt-and-refreeze damage.
Practical Notes
- If the base ever looks slightly separated after chilling, whisk or blend it briefly before churning.
- Do not boil the custard.
- If one batch thickens faster than expected, pull it from the heat immediately and strain it.
- Smaller batches are safer than one giant batch, especially with a yolk-rich formula like this.
Simple Working Summary
For each of the 2 batches:
- Whisk yolks with part of the sugar.
- Heat cream, milk, remaining sugar, and salt to steaming.
- Temper the yolks.
- Cook gently to 170–175°F.
- Strain.
- Add vanilla.
- Chill completely.
- Churn and freeze.
A Practical Parting Suggestion
While you devour the sweet custard, save the egg whites for your next meringue affair! These whites are a precious by-product of your breakfast-for-dessert masterpiece.
Transforming the remnants of a prehistoric-like egg into luxurious dishes makes it feel less like cooking and more like an alchemical endeavor. It’s a culinary journey that any daring gourmand should embark upon. So why not surprise your guests at the next extravagant feast with this unforgettable ice cream?
To see this infusion blend sophistication and whimsy, grab your ice cream maker and transform these ostentatious yolks into something extraordinary. Let the yolk be with you!